Showing posts with label do it try it. Show all posts

August 2, 2012

House Slippers To Be Sewn

Hi everyone, I'm Andrea from foursquarewalls. I'm honored to be a guest blogger for Megan while she's strolling around an old stone French village snapping gorgeous photos and eating buttery baguettes or whatever. Oh I'm not bitter; I'm sure the current view out my window of a restaurant parking lot is equally stunning. Anyway, I love following Megan’s blog because it’s obvious she’s naturally creative and is able to master new crafts very quickly, something I admire in others. Her first sewn dress was pretty spectacular, and made me ashamed that my first ten handmade dresses were basically potato sacks with straps.  I’m a sewing blogger so that’s obviously the thing I love to yap about the most if given the chance. The fact that Megan loves to travel inspired me to think of a way to incorporate my own travel memories into my sewing. So for my guest post I've decided to share with you how I sewed some simple indoor slippers (aka room shoes, house shoes) inspired by my travels to Japan. It's Japanese custom to remove your street shoes when you enter someone’s home, certain public buildings (like school), or anywhere that has tatami flooring. To protect your socks, then, you wear house shoes. The custom exists to protect the floors from outdoor scuff, but also to better designate the indoors as a separate and distinct space from the outdoors. The physical transition represents the mental shift of shedding yourself of the worries of the outside world. 
  I studied for a semester in Osaka, Japan, and visited and lived there briefly after college while my boyfriend taught English in a small mountain town in the Shiga prefecture. So it's a special place to me, and there are certain customs -- like removing your shoes indoors -- that I'd like to incorporate more in my daily American life, too. Just think about it: your shoes trek through public bathrooms, wet grass, muddy parks, gummy sidewalks, mysteriously stained carpets... and you bring them home and march right onto your rugs in them.  
These slippers are lightweight and made of breathable fabrics so they work well in summer. They also have non-slip soles so I can walk without fear of sliding gracelessly into some painful splits. I like the idea that they will keep my home cleaner, but will also protect my bare feet from all the sewing pins I leave laying around my warzone floors. So these slippers are practical all around, right? OK, let's make some!
SUPPLIES:
1/2 yd. (0.5m) fabric for outer top: I used home decor-weight cotton canvas, but you can use any sturdy-ish woven fabric like quilting cotton, linen, tweed, wool, etc...
1/2 yd. fabric for the outer soles: something non-slip. I used a remnant of flannel-backed vinyl (like a tablecloth) that I tested on the floor to see how slippery it was. You can also use suede, rubber or buy ready-made non-slip soles at craft stores.
1/2 yd. fabric for the lining: If you want summer slippers, use something breathable like linen or cotton. If you want warmer or thicker slippers, you can use fleece, felt or flannel.
1/2 yd. interfacing and/or 1/2 yd. interlining: Depends on how comfortable you want these. I used fusible fleece to give the slippers structure, and I used felt to interline the sole for added comfort. You can use quilt batting, too.
*Note that you need approx. 1/2 yd. (0.5m) of everything to accommodate the length of your foot, which seems like a lot of stuff to buy, but there will be enough width of the fabric to make more than one pair of these slippers.  It's not difficult to draft your own pattern to begin. You can trace a flip flop or other sandal to create the sole, and then drape fabric over one-half of your foot, tracing an outline around your foot in the shape you want. Add seam allowances (I used 1/4 inch). Cut the top fabric on the fold to ensure the sides are even.
 Or you can download this free slipper pattern from BurdaStyle just to get the general shape and size you need, changing any details as you please. I didn't use their pattern because it looked like the seams were exposed inside the slipper, so I followed my own method!
For the top of the slippers, cut two in your outer fabric and two in your lining fabric:
For the soles, cut two in your lining fabric, two pieces of felt or batting for comfort, and two pieces of vinyl or whatever non-slip fabric you chose for the soles. You'll notice that I chose the lining fabric of my soles to be from the same fabric as my outer fabric. The lining for the slipper tops are solid beige canvas. My vinyl is also beige. Sorry if that's confusing:
 I interfaced the print fabric with fusible fleece interfacing for structure and added softness. Up to you:
 Pin and stitch the felt/batting pieces to the wrong side of your sole lining fabric:
 Stitch together the back ends of your slipper top lining, right sides together:
 With right sides together, pin and stitch the top lining to the sole lining. You will have to ease in the lining fabric around those curves:
Now stitch the back ends of your main slipper top fabric, right sides together:
 Pin and stitch the outer top fabric to the outer sole (vinyl), right sides together. Pin within the seam allowance, as holes will remain visible in fabric like vinyl or leather. Trim the seam and clip the curves:
 Turn the slippers right side out. If you must press, press the cotton side only, or else the vinyl might melt:
 Fit the outer slipper into the lining so their right sides are touching:
 Pin the slipper openings together, lining up the back center seam. Stitch, leaving an opening for turning:
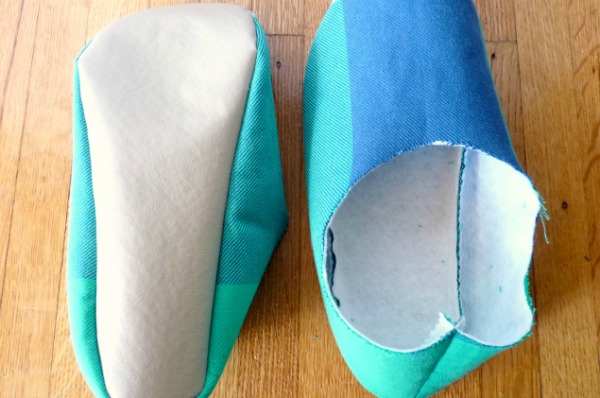
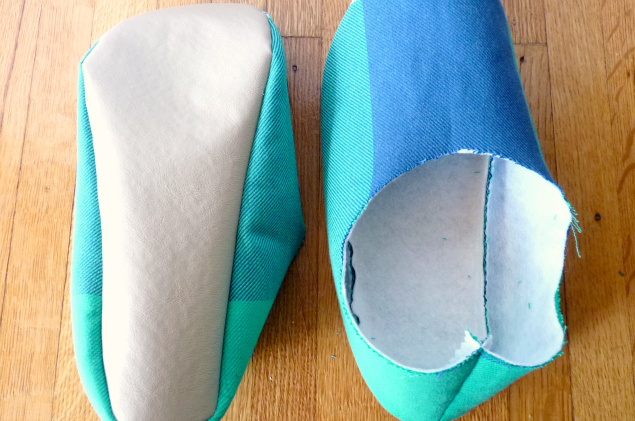
 Pull the right sides through the opening, being careful not to rip any stitches. It'll look like siamese twins:
 Push the lining into the outer shell:
 Slipstitch the opening closed:
 You're done! Now fill them with your huge size 10W feet! Oh those are just mine.
 They're not perfect, but they sure are cozy. And now I expect my floors to be spotless forever. Hope you enjoy making your own house slippers. Thanks for hosting me, Megan!

--A big thank you to Andrea for putting together this post for us!  I can't wait to make these when I get home.  After spending some time in the French countryside, I am 100% head over heels over house slippers.  Each and every tiny, "harmless", intimidating scorpion around these parts is a reminder.

July 17, 2012

Do It Try It: Dandelion Wish To Do List


 I have made many lists in my day, but sometimes merely a pen and paper just doesn't do it justice.  This is a way to make a fun to-do list, wish list, date list, whatever you want.
Materials:  paper, scissors, stick, string, scrap fabric, styrofoam ball or packaging peanut, pins
Step One:  Push stick through center of styrofoam ball far enough before the stick goes through the other side.
Step Two:  Cover styrofoam ball with scrap fabric and fasten with string.
Step Three:  (Optional) Trim the bottom pieces and snip them to look like leaves.
Step Four:  Cut out scraps of paper in the flowery shape you'd like.
Play around with paper color to make your flowers look unique.
Step Five:  Write down your wish list dreams on each flower pedal paper!
Step Six:  Place pins through ends of paper flower pedals.
Step Seven:  Poke pins into stryofoam ball to create the flower look.
Play around with how and where you pin the papers to change the look of your flower.
And that's it!  Fill up your flower and start checking things off your list.  I like to rip the pedal off when I've completed something and leave the pin in, that way when I have a finished flower it looks like a pedal-less dandelion.  Did you ever make a wish and blow on the feathery wisps of a dandelion?  Well, I sure did.  Do what you want, write what you want, and enjoy!

July 12, 2012

Canine Collar Thrift & Craft

I am thrilled to be guest posting on this blog today!  Much like Megan, I am a creative enthusiast and lover of all things beautiful.  I love being creative whether I am working on a painting, playing music, or making a silly collar for my dog.  Today I will share some photos with you of the latter example.
Making these collars for my dog, Albus, was easy and fun.  I found some simple cloth belts at a nearby thrift store.  I snipped it at an approximate length, held a match to the frayed edges and also applied some no-fray liquid, sewed the belt back together leaving a 1-2" gap to loop a metal ring through, and (in honor of this blog) "ta-da"!  You're done!

Hey, stay in touch!

>> Hue and Hum blog
>> Tweet!
>> Instagram? Yes please.

--Thank you so much to Caitlin, (read: Hue), for sharing this with us today!  There are a few dogs around the village I'm in and I maybe want to steal them all.  Every time we go to a market or just a busier town we joke around about getting a puppy.  We'd be lucky if we found one half as cute as little Albus!


July 3, 2012

Do It Try It: A Weekender Bag

This is an extra large weekender multi-purpose tote bag, and it's fairly easy to put together.  I made this because of my dislike for my cheap, finicky, carry-on luggage bag, and my inability to spend upwards of $300 on those dreamy weekender bags I see floating around.  This fits my laptop, camera, phone, books, knitting, clothes, sleeping bag, toiletries, wallet, travel documents, and with room to spare.  It would probably work well as a travel-all diaper bag, beach bag, etc.  Basically, it's whatever you want it to be.  I already want to make two more in smaller varying sizes.
Materials: canvas fabric (1.5 yds), sturdy accent fabric (1 yd), lining fabric (1 yd), thread, needle, pins, sewing machine, scissors, iron, interfacing (optional), chalk pencil, ruler, zipper (24")

Pattern piece measurements:
TOP
-22x7" canvas fabric (cut 2)
MIDSECTION
-SHOULDER STRAP: 3.25x72" accent fabric (cut 2)
-HANDLE: 3x11" canvas fabric (cut 8)
                    3x14.5" accent fabric (cut 2)
-POCKET: 9.5x9.5" canvas fabric (cut 2)
                   7x9.5" canvas fabric (cut 2)
-SIDES: 9x11" (cut 2)
-MAIN: 17x11" (cut 2)
BOTTOM
-26x26" accent fabric
LINING
-TOP: 22x7" (cut 2)
-BODY: 22x24" (cut 2)
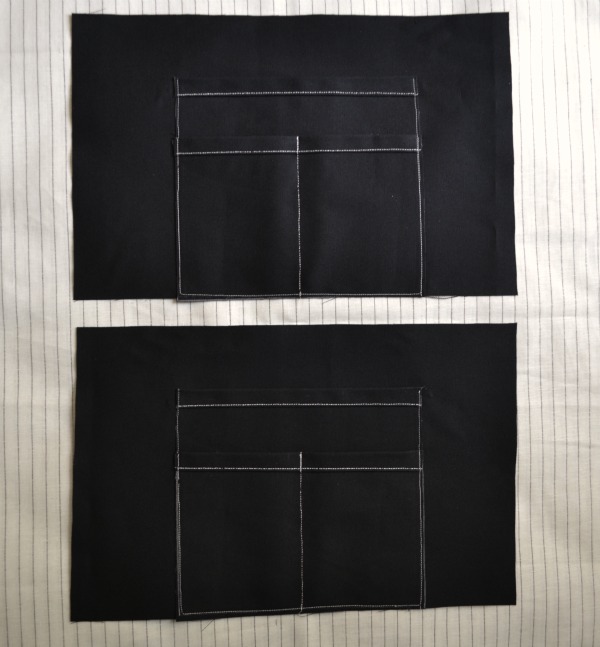
 Step One:  Fold over tops of each pocket piece twice and iron.  Sew edge to keep in place.
Place smaller pocket on top of larger pocket, center, and sew down the middle.
Baste down sides and bottom of smaller pockets to attach to larger pockets.
 Step Two:  Center pocket piece on front and back piece.  Baste down edges and across bottom.
 Step Three: Sew handle pieces together.  Keeping right sides together, sew canvas-accent-canvas.  You will end up with four of these.
 Step Four:  Put handle pieces right side together, sew seam, and turn inside out.  Press fabric.
(Tip: I added interfacing to the handle for more structure).
 Step Five:  Fold center handle piece together and sew edges approximately 1.5" from outer fabric.
 Step Six:  Pin down handle pieces in place making sure to overlap and cover pocket edges.
Sew up to 2" below top edge of front piece.
 Step Seven:  Place shoulder strap pieces right sides together, sew sides, turn inside out.
Center should strap ends onto the side fabric piece and sew in place.
Make sure to adjust length to your liking.  I personally didn't need an adjustable strap because I never ever adjust straps anyway.  I also like my straps a little longer.
(Tip: I added interfacing to the back of each side piece to make it a bit sturdier)
 Step Eight:  Sew front and back pieces to side pieces.  Make sure always to sew with right sides together.  Press seams.  End result is the midsection shell of the bag.
 Step Nine:  Sew down each side of folded bottom piece.  Make sure the width still corresponds to width of midsection shell.  Square off corners with an 8" width and trim excess fabric.
Turn right side out.
Step Ten:  Turn midsection shell inside out and slide it over bottom piece so that right sides are together.  The opening of the bottom piece should line up with the bottom of the midsection shell.  Pin around both sections, sew, and flip piece right side out.  Press seams if you can.
(Tip: Optional addition!  My accent fabric (fake leather) isn't the sturdiest of all things, so I sewed a canvas and interface reinforcement rectangle to sit at the bottom.  I probably should have lined that whole bottom section with a sturdier fabric from the start, but that's what happens when you make things up as you go along.)
(Yup, I confess I put this post together as I made this without any real plans to go on...)
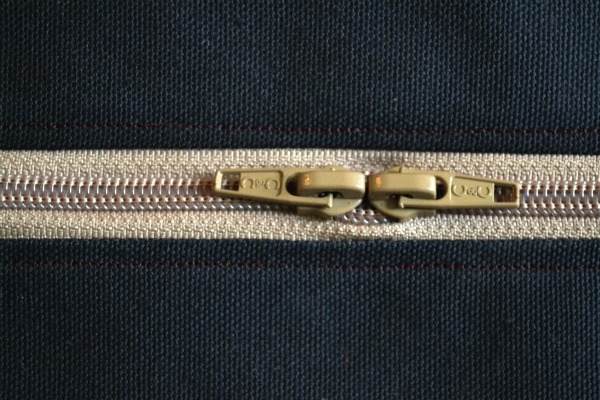
 Step Eleven: To start the top layer your canvas right side up, zipper right side down, and top lining piece right side down.  Line up edges and sew.  Repeat on other side of zipper tape with the other top canvas and lining pieces.
 Step Twelve:  Press fabric away from zipper.  I also top stitched a bit to make sure the fabric wouldn't easily get stuck in the zipper.
 Step Thirteen:  Square off corners of top pieces making sure to sew on the wrong side of fabric.
I measured out from the center of each side the measurements that correspond to the top of my midsection body piece.  Fold corners off, much like sewing a dart, sew, and trip extra fabric.
 Step Fourteen:  Do the same for the inner lining fabric corners making sure to sew on the wrong side of the fabric as well.
 Step Fifteen:  Sew down the sides of lining fabric, right sides together, and sew about 6 inches into the bottom on each side, leaving an opening.  Square off bottoms the same way you squared off the out bottom piece with the accent fabric (step nine).
 Step Sixteen:  Line up main lining edges to the top lining edges, right sides together, and pin around the entire way.  (Mine was actually a little bit off and I had to pleat some extra fabric... such is life).  Sew together.
 Step Seventeen:  Open up zippers, flip top inside out, and line up the top opening with the midsection body opening.  Line up corner seams and pin.  You will have to pull the main body of the bag through the inner lining to make sure it doesn't get caught in the sewing machine.  Sew all the way around.  The last step is flipping it right side out, sewing up that bottom lining seam, pressing whatever needs pressing, and marveling at your hard work.
Ta-da!  Now my only suggestion is to take a trip.  Load up the bag and go somewhere.  I'll be using mine in France and will certainly be putting it to the test.